category
A step-by-step guide to integrating Google Gemini into your Angular applications.

In this post, you are going to learn how to access Gemini APIs to create the next generation of AI-enabled Applications using Angular.
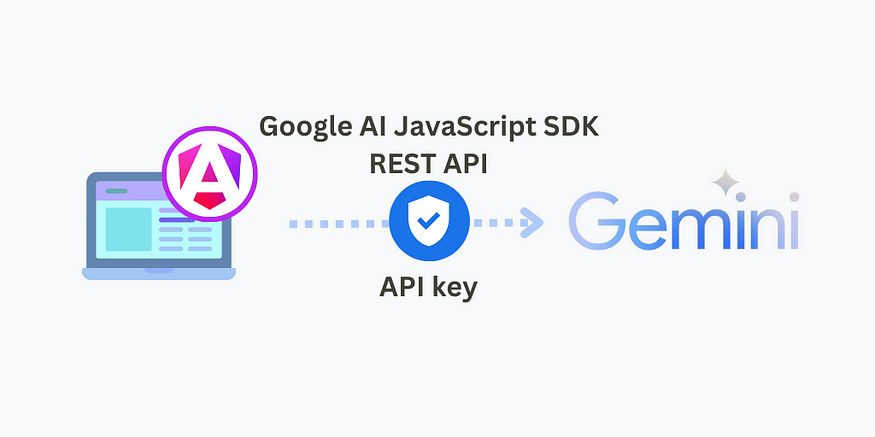
We’ll build a simple application to test Gemini Pro and Gemini Pro Visual via the official client. As a bonus, we will also show how you can use Vertex AI via its REST API.
Here’s what we’ll cover:
- Introduction to Google Gemini
- Getting your API key from Google AI Studio
- Creating the Angular Application
- Generate text from text-only input (text)
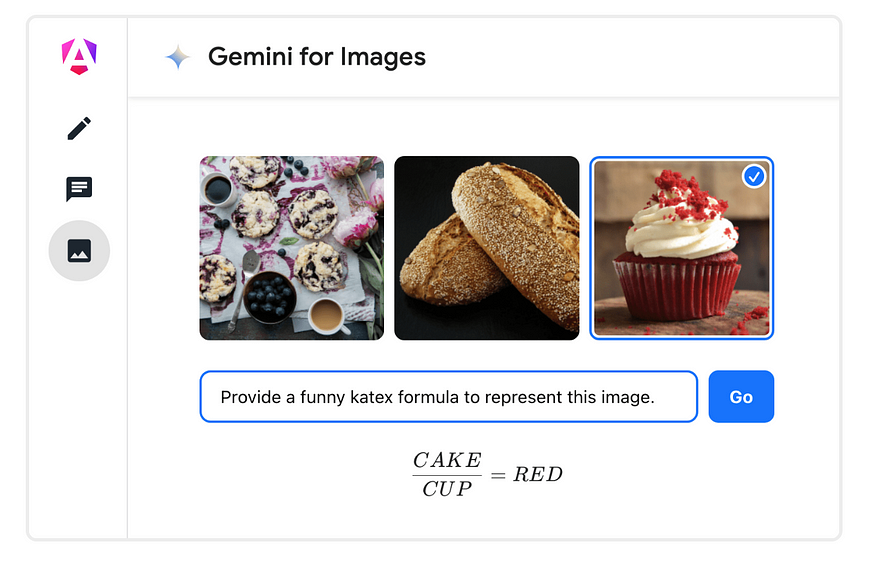
- Generate text from text-and-images input (multimodal)
- Build multi-turn conversations (chat)
- Generate content using streaming (stream)
- Bonus: generate AI content with Vertex AI via the REST API
- Running the code and verifying the response
- Conclusions
Google Gemini简介
Google Gemini是一个大型语言模型(LLM)家族,提供由Google AI创建的最先进的AI功能。Gemini模型包括:
- Gemini Ultra。最大、最强大的模型在编码、逻辑推理和创造性协作等复杂任务中表现出色。可通过Gemini Advanced(前身为巴德)获得。
- Gemini Pro。针对多种任务进行了优化的中型型号,其性能可与Ultra相媲美。通过Gemini聊天机器人、谷歌工作区和谷歌云提供。Gemini Pro 1.5的性能得到了提升,包括在长上下文理解方面取得了突破,可以理解多达一百万个令牌,包括文本、代码、图像、音频和视频。
- Gemini Nano。一种专为设备上使用而设计的轻量级模型,为手机和小型设备带来了人工智能功能。适用于Pixel 8和三星S24系列。
- Gemini。受Gemini启发的开源模型,以更小的尺寸提供最先进的性能,并在设计时考虑了负责任的人工智能原则。
从Google AI Studio获取API密钥
访问aistudio.google.com并创建一个API密钥。如果您不在美国,您可以使用全球可用的Vertex AI或使用VPN服务。

Creating the Angular Application
Use the Angular CLI to generate a new application:
ng new google-ai-gemini-angularThis scaffolds a new project with the latest Angular version.
Setting up the project
Run this command to add a new environment:
ng g environmentsThis will create the following files for development and production:
src/environments/environment.development.ts
src/environments/environment.ts
Edit the development file to include your API Key:
// src/environments/environment.development.ts
export const environment = {
 API_KEY: "<YOUR-API-KEY>",
};
Google AI JavaScript SDK
This is the official client to access Gemini models. We will use it to:
- Generate text from text-only input (text)
- Generate text from text-and-images input (multimodal)
- Build multi-turn conversations (chat)
- Generate content as is created using streaming (stream)
Add this package to your project:
npm install @google/generative-ai
Initialise your model
Before calling Gemini we need to go through the model initialisation. This includes the following steps:
- Initialising
GoogleGenerativeAIclient with your API key. - Choosing a Gemini model:
gemini-proorgemini-pro-vision. - Setting up model parameters including
safetySettings,temperature,top_p,top_kandmaxOutputTokens.
import {
 GoogleGenerativeAI, HarmBlockThreshold, HarmCategory
} from '@google/generative-ai';
...
const genAI = new GoogleGenerativeAI(environment.API_KEY);
const generationConfig = {
 safetySettings: [
   {
     category: HarmCategory.HARM_CATEGORY_HARASSMENT,
     threshold: HarmBlockThreshold.BLOCK_LOW_AND_ABOVE,
   },
 ],
 temperature: 0.9,
 top_p: 1,
 top_k: 32,
 maxOutputTokens: 100, // limit output
};
const model = genAI.getGenerativeModel({
 model: 'gemini-pro', // or 'gemini-pro-vision'
 ...generationConfig,
});
...
For Safety settings you can use the defaults (block medium or high) or adjust them to your needs. In the example, we increased the threshold for harassment to block outputs with low probability or above to be unsafe. You can find a more detailed explanation here.
These are all the models available and their default settings. Theres a limit of 60 request per minute. You can learn more about model parameters here.
Generate text from text-only input (text)
Below you can see a code snippet demonstrating Gemini Pro with a text-only input.
async TestGeminiProVisionImages() {
 try {
   let imageBase64 = await this.fileConversionService.convertToBase64(
     'assets/baked_goods_2.jpeg'
   );

   // Check for successful conversion to Base64
   if (typeof imageBase64 !== 'string') {
     console.error('Image conversion to Base64 failed.');
     return;
   }
   // Model initialisation missing for brevity
   let prompt = [
     {
       inlineData: {
         mimeType: 'image/jpeg',
         data: imageBase64,
       },
     },
     {
       text: 'Provide a recipe.',
     },
   ];
   const result = await model.generateContent(prompt);
   const response = await result.response;
   console.log(response.text());
 } catch (error) {
   console.error('Error converting file to Base64', error);
 }
}
Generate text from text-and-images input (multimodal)
This example demonstrates how to use Gemini Pro Vision with text and images as input. We are using an image in src/assets for convenience.
async TestGeminiProVisionImages() {
  try {
    let imageBase64 = await this.fileConversionService.convertToBase64(
      'assets/baked_goods_2.jpeg'
    );

    // Check for successful conversion to Base64
    if (typeof imageBase64 !== 'string') {
      console.error('Image conversion to Base64 failed.');
      return;
    }
    // Model initialisation missing for brevity
    let prompt = [
      {
        inlineData: {
          mimeType: 'image/jpeg',
          data: imageBase64,
        },
      },
      {
        text: 'Provide a recipe.',
      },
    ];
    const result = await model.generateContent(prompt);
    const response = await result.response;
    console.log(response.text());
  } catch (error) {
    console.error('Error converting file to Base64', error);
  }
}
In order to convert the input image into Base64 you can use the FileConversionService below or an external library.
// file-conversion.service.ts
import { Injectable } from '@angular/core';
import { HttpClient } from '@angular/common/http';
import { firstValueFrom } from 'rxjs';
({
providedIn: 'root',
})
export class FileConversionService {
constructor(private http: HttpClient) {}
async convertToBase64(filePath: string): Promise<string | ArrayBuffer | null> {
const blob = await firstValueFrom(this.http.get(filePath, { responseType: 'blob' }));
return new Promise((resolve, reject) => {
const reader = new FileReader();
reader.onloadend = () => {
const base64data = reader.result as string;
resolve(base64data.substring(base64data.indexOf(',') + 1)); // Extract only the Base64 data
};
reader.onerror = error => {
reject(error);
};
reader.readAsDataURL(blob);
});
}
}
Image requirements for Gemini:
- Supported MIME types:
image/png,image/jpeg,image/webp,image/heicandimage/heif. - Maximum of 16 images.
- Maximum of
4MBincluding images and text. - Large images are scaled down to fit
3072 x 3072pixels while preserving their original aspect ratio.
Build multi-turn conversations (chat)
This example shows how to use Gemini Pro to build a multi-turn conversation.
async TestGeminiProChat() {
  // Model initialisation missing for brevity

  const chat = model.startChat({
    history: [
      {
        role: "user",
        parts: "Hi there!",
      },
      {
        role: "model",
        parts: "Great to meet you. What would you like to know?",
      },
    ],
    generationConfig: {
      maxOutputTokens: 100,
    },
  });
  const prompt = 'What is the largest number with a name? Brief answer.';
  const result = await chat.sendMessage(prompt);
  const response = await result.response;
  console.log(response.text());
  }
You can use the initial
usermessage in the history as a system prompt. Just remember to include amodelresponse acknowledging the instructions. Example: User: adopt the role and writing style of a pirate. Don’t lose character. Reply understood if you understand these instructions. Model: Understood.
Generate content as is created using streaming (stream)
This example demonstrates how to use Gemini Pro to generate content using streaming.
async TestGeminiProStreaming() {
  // Model initialisation missing for brevity

  const prompt = {
    contents: [
      {
        role: 'user',
        parts: [
          {
            text: 'Generate a poem.',
          },
        ],
      },
    ],
  };
  const streamingResp = await model.generateContentStream(prompt);
  for await (const item of streamingResp.stream) {
    console.log('stream chunk: ' + item.text());
  }
  console.log('aggregated response: ' + (await streamingResp.response).text());
}
As a result of generateContentStream you will receive and object where you can read each chunk stream as is generated and the final response.
Bonus: generate AI content with Vertex AI via the REST API
As an alternative to the official JavaScript client you can use the Gemini REST API provided by Vertex AI. Vertex AI is a full AI platform made available as a managed service in Google Cloud where you can train and deploy AI models including Gemini.
To secure your REST API access, you need to create an account and get the credentials for your application so only you can access it. Here are the steps:
- Sign up for a Google Cloud account and enable billing — this gives you access to Vertex AI.
- Create a new project in the Cloud Console. Make note of the project ID.
- Enable the Vertex AI API for your project.
- Install the gcloud CLI and run
gcloud auth print-access-token. Save the printed access token - you’ll use this for authentication.
Once you have the project ID and access token, you’re ready to move on to the Angular app. To verify everything is setup correctly you can try these curl commands.
Edit the development file to include the project ID and access token:
// src/environments/environment.development.ts
export const environment = {
  API_KEY: "<YOUR-API-KEY>", // Google AI JavaScript SDK access
  PROJECT_ID: "<YOUR-PROJECT-ID>", // Vertex AI access
  GCLOUD_AUTH_PRINT_ACCESS_TOKEN: "<YOUR-GCLOUD-AUTH-PRINT-ACCESS-TOKEN>", // Vertex AI access
};
To make requests via the REST API, you need to include the HttpClient provider:
// app.config.ts
import { provideHttpClient } from "@angular/common/http";

export const appConfig: ApplicationConfig = {
  providers: [
    provideRouter(routes),
    provideHttpClient()
  ]
};
With this import, we can inject HttpClient into any component or service to make web requests.
// app.component.ts
import { HttpClient } from '@angular/common/http';
({
selector: 'app-root',
standalone: true,
...
})
export class AppComponent implements OnInit {
constructor(public http: HttpClient) {}
}
To access Vertex AI via REST API we need to do a bit more work as there’s no client available. Without any help, it takes a bit more effort to build the request and read the response.
async TestGeminiProWithVertexAIViaREST() {
  // Docs: https://cloud.google.com/vertex-ai/docs/generative-ai/model-reference/gemini#request_body
  const prompt = this.buildPrompt('What is the largest number with a name?');
  const endpoint = this.buildEndpointUrl(environment.PROJECT_ID);
  let headers = this.getAuthHeaders(
    environment.GCLOUD_AUTH_PRINT_ACCESS_TOKEN
  );

  this.http.post(endpoint, prompt, { headers }).subscribe((response: any) => {
    console.log(response.candidates?.[0].content.parts[0].text);
  });
}

buildPrompt(text: string) {
  return {
    contents: [
      {
        role: 'user',
        parts: [
          {
            text: text,
          },
        ],
      },
    ],
    safety_settings: {
      category: 'HARM_CATEGORY_SEXUALLY_EXPLICIT',
      threshold: 'BLOCK_LOW_AND_ABOVE',
    },
    generation_config: {
      temperature: 0.9,
      top_p: 1,
      top_k: 32,
      max_output_tokens: 100,
    },
  };
}

buildEndpointUrl(projectId: string) {
  const BASE_URL = 'https://us-central1-aiplatform.googleapis.com/';
  const API_VERSION = 'v1'; // may be different at this time
  const MODEL = 'gemini-pro';
  let url = BASE_URL; // base url
  url += API_VERSION; // api version
  url += '/projects/' + projectId; // project id
  url += '/locations/us-central1'; // google cloud region
  url += '/publishers/google'; // publisher
  url += '/models/' + MODEL; // model
  url += ':generateContent'; // action
  return url;
}

getAuthHeaders(accessToken: string) {
  const headers = new HttpHeaders().set(
    'Authorization',
    `Bearer ${accessToken}`
  );
  return headers;
}
Running the code
Uncomment the code you want to test within the ngOnInit body from the GitHub project.
ngOnInit(): void {
  // Google AI
  this.TestGeminiPro();
  //this.TestGeminiProChat();
  //this.TestGeminiProVisionImages();
  //this.TestGeminiProStreaming();

  // Vertex AI
  //this.TestGeminiProWithVertexAIViaREST();
}
In order to run the code run this command in the terminal and navigate to localhost:4200.
ng serveVerifying the response
To verify the response, you can quickly check the Console output in your browser.
console.log(response.text());
The largest number with a name is a googolplex. A googolplex is a 1 followed by 100 zeroes.Congratulations! You now have access to Gemini capabilities.
Conclusions
By completing this tutorial, you learned:
- How to obtain an API Key and set up access to Gemini APIs
- How to call Gemini Pro using text and chat
- How to handle input images for Gemini Pro Vision
- Bonus: How to setup and call Gemini using Vertex AI via the REST API
- How to handle the response and outputs
You now have the foundation to start building AI-powered features like advanced text generation into your Angular apps using Gemini. The complete code is available on GitHub.
Want to see a more complex project?
I built a full blown Gemini Chatbot using Angular Material, ngx-quill and ngx-markdown showcasing text, chat and multimodal capabilities.

Feel free to fork the project here. If you like this project don’t forget to leave a star to show support of my work and to other contributors in the Angular community.
Resources
- 登录 发表评论